Send USDT
The Send USDT page presents different transfer options based on the selected wallet mode.
Local Wallet Send
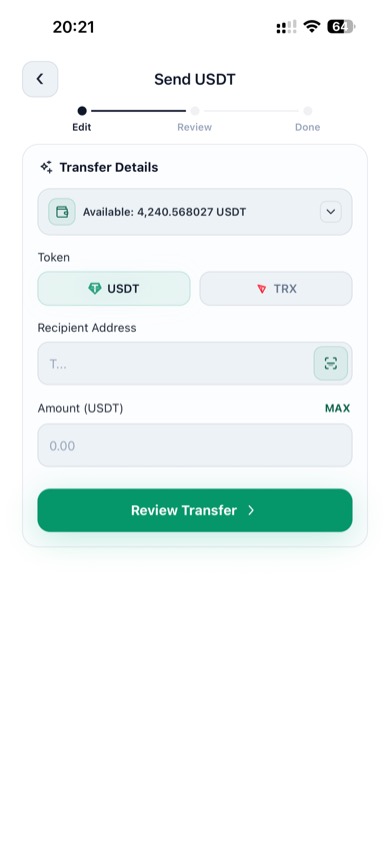
Local Wallet on-chain send
Use Local Wallet when you want to sign and broadcast an on-chain transaction from your HD address.
Steps
- Open Assets and make sure Local Wallet is selected
- Tap Send
- Choose the token and enter the destination address
- Enter the amount and tap Review Transfer
- Confirm the details and complete password verification
Notes
- Local Wallet transfers require enough native gas token on the same address
- TRON transfers need TRX
- Ethereum transfers need ETH
Cloud Wallet Instant Transfer
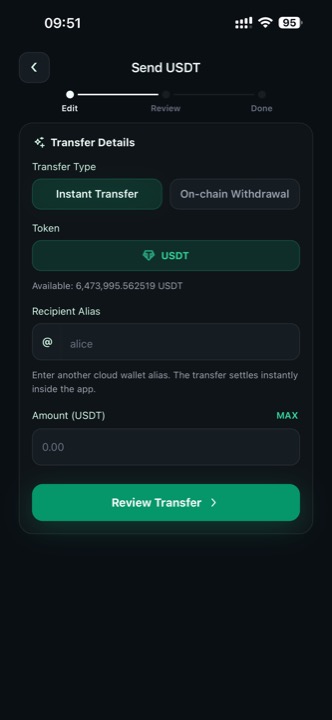
Instant Transfer to a cloud wallet alias
Use Instant Transfer when both sender and recipient use Cloud Wallet.
Steps
- Switch to Cloud Wallet on the Assets page
- Tap Send
- Keep Transfer Type set to Instant Transfer
- Enter the recipient alias
- Enter the amount and tap Review Transfer
This flow settles inside the app, so you enter an alias instead of a blockchain address.
Cloud Wallet On-chain Withdrawal
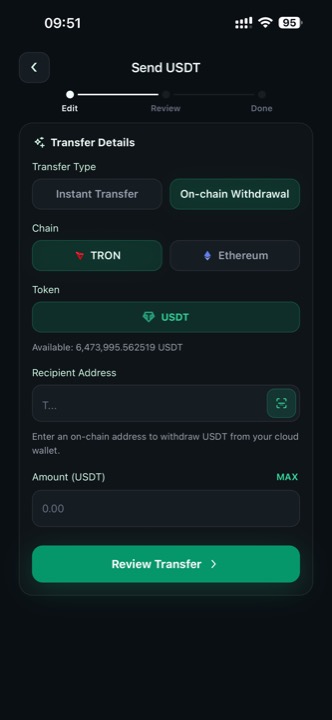
Cloud Wallet on-chain withdrawal
Use On-chain Withdrawal when you want to send cloud wallet funds to a blockchain address.
Steps
- Switch to Cloud Wallet
- Tap Send
- Select On-chain Withdrawal
- Choose TRON or Ethereum
- Enter or scan the destination address
- Enter the amount and continue to review
Safety Tips
- Double-check the alias before an instant transfer
- Double-check the address and network before an on-chain withdrawal
- Use Scan whenever possible to reduce typing errors
- Review the transfer summary carefully before confirming